


Deploy LLMs On-Prem: From Docker Model Runner to Kubernetes with Jozu Hub
Introduction
It has been a whirlwind ever since ChatGPT was released back in late 2022. Almost overnight, we started getting open-source LLMs like LLaMA, Qwen, and DeepSeek. This made LLM adoption easier for enterprises, as they no longer had to send proprietary data to third-party, closed APIs; they could rather host the models themselves. But another problem arose, because now they were responsible for managing the entire infrastructure stack, down to the inference serving API. Docker containers became the go-to solution, and recently, Docker Model Runner made it even easier to pull, run, and serve AI models locally.
However, while Docker is great when you want to get models up and running quickly, it wasn't built with ML-specific workflows in mind. In the real world, along with the model you have code, company-specific datasets, and configuration files that all need to be versioned and tracked across deployments. There also needs to be an audit trail.
In this tutorial, we'll see how Jozu Hub addresses these gaps. We'll walk through transitioning from Docker Model Runner to Jozu Hub: obtaining model files, packaging and versioning them into a ModelKit, and pushing to Jozu Hub. Finally, we'll deploy to Kubernetes using Jozu's Rapid Inference Containers.
What you'll need: Docker with Model Runner, the KitOps CLI, Python 3, Minikube with kubectl, and a free Jozu Hub account. We'll be deploying SmolLM2 (360M parameters, Q4_K_M quantization), so even modest hardware will work — no GPU required. Expect about 30–45 minutes to complete the full walkthrough.
What you'll have at the end: A versioned, auditable ModelKit in Jozu Hub serving a live LLM inference API on a local Kubernetes cluster via a Rapid Inference Container.
Why Move from Docker Model Runner to Jozu Hub for ML/AI
Docker Hub's Shortcomings for Production ML
While Docker is great at containerization, AI/ML projects have unique needs that Docker Hub simply isn't designed to handle:
The versioning problem: Docker images treat the entire container as a single unit of deployment. But ML projects are made up of many interdependent assets: model weights, custom or company datasets, configuration files, licenses, documentation, and more. All of these evolve independently. Trying to track versions across these assets using only Docker image tags quickly becomes very difficult, if not outright impossible.
Inefficient for Iteration: AI/ML workflows are highly iterative by nature. Between experiments, fine-tuning runs, dataset updates, and config tweaks, you'll quickly accumulate hundreds of slightly different Docker images for a single project. This becomes a tagging nightmare and a massive storage hog.
Traceability Problem: Container images are mutable so if a teammate updates a config file or swaps out model weights but keeps the same tag (like my-llm:latest), they've just broken reproducibility for everyone. There's no way to trace a model running in production back to the exact assets that were shipped with it.
Security and compliance gaps: Docker Hub has basic features like vulnerability scanning, but lacks advanced features required for AI/ML projects, like more granular roles in role-based access controls (RBAC) to specify who in the organization has what type of access to what asset. There is also limited audit trail capabilities compared to purpose-built ML platforms, which are required for compliance.
Benefits of Automated, Versioned Deployments
-
Granular versioning: Version your model, dataset, code, and configs independently while keeping them linked. You should always know exactly which components were used together at any point in time.
-
Differential updates: Only transfer what actually changed. If you updated your documentation or license file but the 7GB model weights stayed the same, you shouldn't have to re-upload those weights.
-
Complete audit trails: Every change to assets, every deployment, every access tracked with a complete lineage. Audit reports should be available for compliance reviews or debugging.
-
Security: Automated security scanning for every model (multiple evaluations), tamper-proof artifacts via cryptographic signing, and policy enforcement that blocks non-compliant models from ever reaching production.
Jozu Hub's ModelKit Approach
At the heart of Jozu Hub is the ModelKit, a packaging format bundling all the artifacts of your AI/ML project (datasets, code, configs, documentation, model weights, etc.) into a single OCI-compliant artifact. Think of it like a git repository that tracks and versions your ML project, but packaged in a way that container registries already understand.
Some key benefits of using ModelKits include:
-
Selective unpacking: Unpack only what you need (e.g just the model weights, just the dataset, or just the configs). This speeds up pipelines, reduces your compute overhead, and avoids unnecessary data movement.
-
No duplication for shared assets: Common assets like datasets or configuration files can be reused across multiple ModelKits without bloating storage. You no longer need to store the same large files in every image.
-
Proper version control: With ModelKit, all project artifacts are versioned and bundled together, enabling full reproducibility and traceability. You can also use familiar, registry-native tags (for example,
:latest,:staging,:prod) just like you would with Docker images, but without losing auditability. -
Standard-based and portable: Because ModelKits are OCI-compliant, they work with any container registry and can be managed just like any container image. There's no vendor lock-in. You can store them alongside your regular container images and manage them using the same authentication, RBAC, and access controls you already have in place.
Jozu's Governance & Security Audit
Full Provenance: Jozu Hub maintains a full audit trail for every ModelKit, providing a complete chain of custody from creation to production deployment. You can see exactly which model is running in production and trace it back to the code and other assets that were packaged and shipped with it.
Security Scanning & Policy Gates: Before a model can be deployed, Jozu Hub automatically scans it for vulnerabilities, license compliance issues, and policy violations. You can set rules to block deployments if scans fail, require manual approval, or enforce specific security rules.
Tamper-Proof Packaging: ModelKits can be cryptographically signed using industry-standard tools like Cosign. Any unauthorized change to the contents, whether to model weights, datasets, or any other artifact, will be immediately detected through signature verification, preventing compromised artifacts from entering production.
Jozu's Rapid Inference Containers (RICs)
Once you have a ModelKit in Jozu Hub, especially when the models are LLMs, you don't need to write custom inference API code just to serve the model. Jozu can automatically generate Rapid Inference Containers (RICs) for you. These are pre-configured, optimized inference containers built directly from your ModelKit that are ready to serve your model in production.
Why this matters:
-
Zero configuration: You don't write Dockerfiles, configure servers, or set up inference APIs. Jozu does it automatically based on your model format and metadata. You can get a llama.cpp RIC for your GGUF model, or a vLLM RIC for your Safetensors model.
-
Optimized for performance: RICs are tuned for inference workloads, not bloated with unnecessary dependencies.
-
7x faster deployment (based on Jozu benchmarks): Because RICs are pre-built and cached, spinning up a new model server is significantly faster than traditional container deployments.
-
Kubernetes-ready: Jozu provides a ready-to-use Kubernetes deployment YAML, making it straightforward to deploy RICs into existing clusters.
Prerequisites and System Requirements
This section outlines the hardware requirements, software, and tooling needed to run the model locally, package and version it with KitOps, and deploy it to a local Kubernetes cluster using Minikube.
Hardware Requirements for LLM Inference
AI/ML inference can be compute & resource-intensive, but your exact needs depend on the model size and quantization level you choose.
GPU vs CPU: Understanding the Performance Gap
GPUs (Graphics Processing Units) are fundamentally better for LLM inference because they're built with thousands of cores designed for parallel computation, making them exponentially faster at the matrix multiplications that neural networks perform during inference. For a real-world comparison: a mid-range GPU like the RTX 4070 Ti can generate 30-50 tokens per second on a 7B model, while a modern CPU with 8+ cores and high clock speed will inference the same model at around 5-10 tokens per second.
That said, CPUs (Central Processing Units) are still a viable option, especially if you don't have access to a powerful GPU. While much slower, modern CPUs with higher core counts and advanced instruction sets (such as AVX-512) can deliver usable inference speeds for smaller or quantized models. This makes CPU inference a cost-effective choice for experimentation, development, or deployments where latency is less critical.
Calculating Your Needs: Model Size, Quantization, and Memory
Another major constraint is memory (including disk space, GPU VRAM, and system RAM). Memory requirements are primarily determined by the model's parameter count (eg, 7B, 13B, 70B) and the quantization used.
-
Quantization is a compression technique that reduces the numerical precision of model weights, dramatically lowering memory usage at a relatively small cost to accuracy. This is what makes running large models on consumer-grade hardware possible.
-
A Simple Formula: A good rule of thumb for estimating memory needs is:
- Full Precision (e.g., FP16, BF16): ~2 GB per 1B parameters.
- 8-bit Quantization (e.g., INT8, Q8_K_M, Q8_0): ~1 GB per 1B parameters.
- 4-bit Quantization (e.g., Q4_K_M, Q4_0): ~0.5 GB per 1B parameters.
For example, a 7B model requires roughly 14 GB at full precision. An 8-bit quantized version cuts this to about 7 GB, while a 4-bit quantized version brings it down further to roughly 3.5 GB with acceptable quality degradation that's still fine for the majority of use cases.
-
Storage Considerations: For disk storage, an NVMe SSD is strongly recommended for fast model loading times and reduced I/O bottlenecks. Loading a 70B model from NVMe takes about 30 seconds versus 3-5 minutes from a traditional hard drive.
For even more detailed hardware guidance, check out: LLM Hardware Requirements & Setup for Local Environment - ML Journey.
In this tutorial, we'll be using CPU inference, since the model we'll deploy, SmolLM2 (360M parameters), is relatively small and a 4-bit quantized (Q4_K_M) version, so it runs smoothly even on very modest hardware.
Required Tooling and Environment Setup
For this tutorial, we'll be working on a Ubuntu Linux distribution, and for convenience, we'll use Homebrew to install most of the tools we need. For other operating systems, such as macOS, Windows, and other Linux distros, we'll provide alternative installation instructions and links where needed.
Installing Homebrew (Note: For only Linux / macOS users)
Open your terminal and run the following command:
/bin/bash -c "$(curl -fsSL https://raw.githubusercontent.com/Homebrew/install/HEAD/install.sh)"Add Homebrew to the path, and apply it to the current session:
# For Linux
echo 'eval "$(/home/linuxbrew/.linuxbrew/bin/brew shellenv)"'  >> ~/.bashrc
eval "$(/home/linuxbrew/.linuxbrew/bin/brew shellenv)"

# For macOS M1/M2/M3
echo 'eval "$(/opt/homebrew/bin/brew shellenv)"' >> ~/.zprofile
eval "$(/opt/homebrew/bin/brew shellenv)"

# For macOS (Intel)
echo 'eval "$(/usr/local/bin/brew shellenv)"'  >> ~/.zprofile
eval "$(/usr/local/bin/brew shellenv)"
Install homebrew dependencies (Note: For only Linux users):
# For Debian or Ubuntu
sudo apt-get install build-essential procps curl file git

# For Fedora
sudo dnf group install development-tools
sudo dnf install procps-ng curl file

# For CentOS Stream or RHEL
sudo dnf group install 'Development Tools'
sudo dnf install procps-ng curl file

# For Arch Linux
sudo pacman -S base-devel procps-ng curl file git
Install Docker
For Ubuntu Linux users, run the following command in the terminal to uninstall the old Docker version if it already exists on the machine:
sudo apt remove docker docker-engine docker.io containerd runc docker-compose docker-compose-v2 docker-doc podman-dockerUpdate package index, install prerequisites, and add Docker's official GPG key:
sudo apt update
sudo apt install ca-certificates curl
sudo install -m 0755 -d /etc/apt/keyrings
sudo curl -fsSL https://download.docker.com/linux/ubuntu/gpg -o /etc/apt/keyrings/docker.asc
sudo chmod a+r /etc/apt/keyrings/docker.asc
Add the Docker repository to Apt sources:
echo \
  "deb [arch=$(dpkg --print-architecture) signed-by=/etc/apt/keyrings/docker.asc] https://download.docker.com/linux/ubuntu \
  $(. /etc/os-release && echo "$VERSION_CODENAME") stable" | \
  sudo tee /etc/apt/sources.list.d/docker.list > /dev/null
Update apt package index, install Docker Engine, CLI, and plugins:
sudo apt update
sudo apt install -y docker-ce docker-ce-cli containerd.io docker-buildx-plugin docker-compose-plugin
Verify the installation was successful:
sudo docker run hello-worldYou should see a response like below:
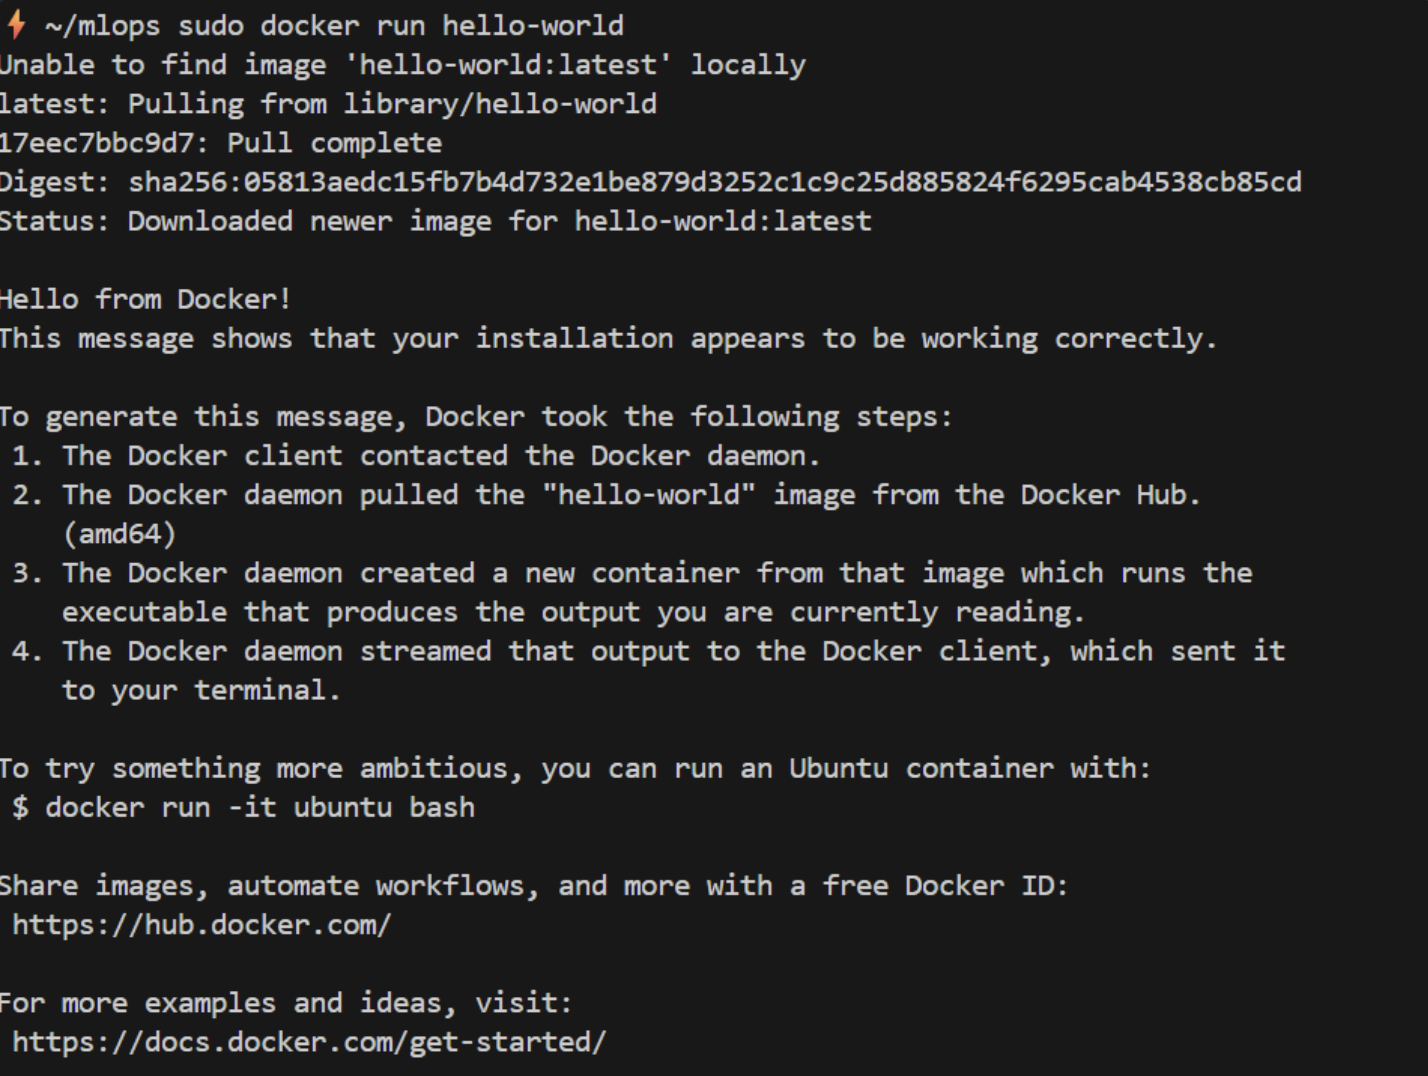
For other Linux distros, Windows, and macOS users. Below is the link to the executable or installation instructions.
Linux Distro Install | Docker Docs
Windows | Docker Docs
Mac | Docker Docs
Docker Model Runner
For Linux users, the Docker Model Runner is available as a package. To install it, run:
sudo apt-get update
sudo apt-get install docker-model-plugin
For Windows and macOS with Docker Desktop installed, here are the instructions to enable the Docker model runner: Get started with DMR | Docker Docs
To check that the installation/enabling of Docker Model Runner was successful, run the following command in the terminal (for all users, Linux, macOS, Windows):
docker model versionYou should see a response like below:

Install KitOps CLI
For Linux / macOS users, run the following command to use Homebrew to install:
brew tap kitops-ml/kitops
brew install kitops
For Windows users, install instructions are here: Install KitOps CLI - macOS, Windows, Linux | KitOps
Also, check that the installation was successful:
kit versionMinikube and kubectl installation
Minikube will enable us to set up a Kubernetes cluster locally on our machine, and kubectl is a command-line tool we will use to communicate with Minikube.
For Linux / macOS users, run the following command to install Minikube with Homebrew:
brew install minikubeNote: kubectl will be automatically installed with Minikube
Let's start Minikube's Kubernetes cluster locally:
minikube startYou should get a response like below:
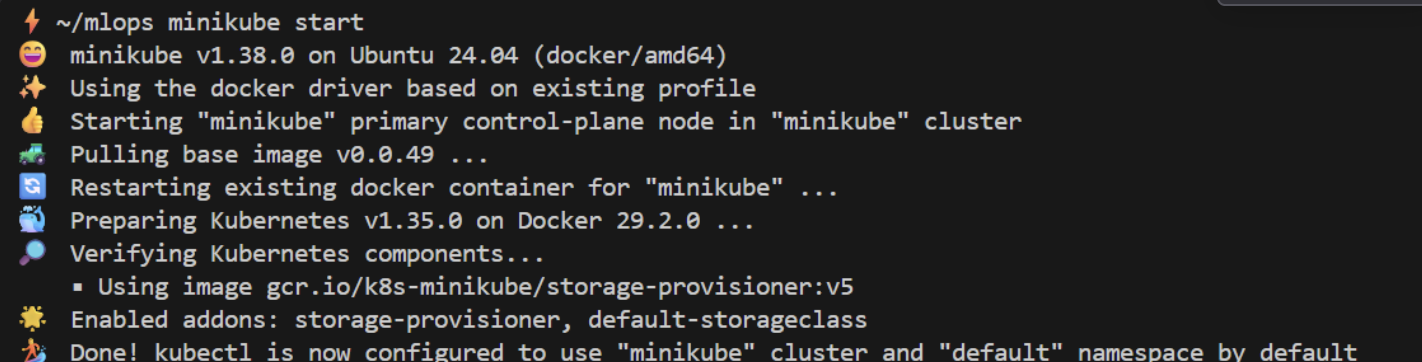
For Windows users, install instructions are here: Windows install | minikube
Alright, with that out of the way, let's install the Python libraries we'll need. We'll assume you already have Python installed. Run the following command:
pip install openai pykitopsNote: We see how to connect OpenAI SDK to our locally deployed model later, and the pykitops library will be used to create the ModelKits.
Account Setup and Authentication
Setting up the Jozu Hub account
Finally, it's time to head over to Jozu Hub and create an account. Make sure to note the email (used as your username) and the password you choose; we'll need these later.
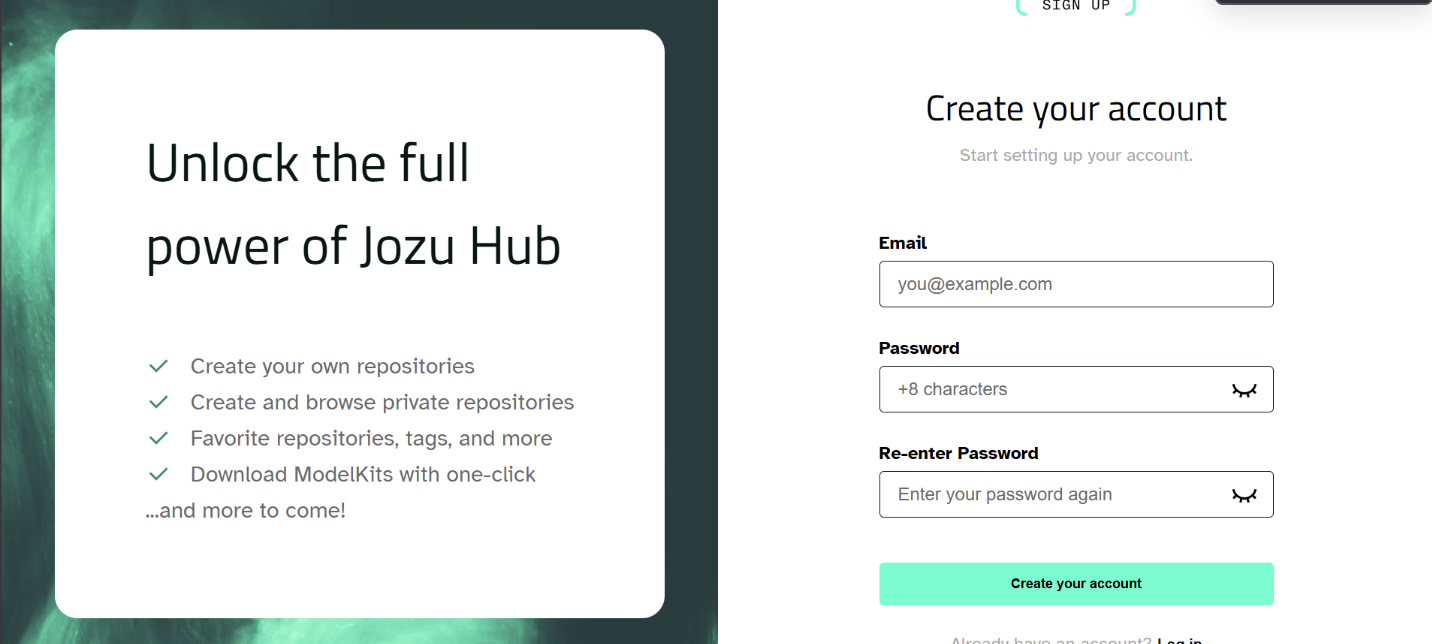
Configuring authentication credentials
Now, to authenticate our KitOps CLI with the Jozu Hub, run the following command:
kit login jozu.mlYou will be prompted to insert the username (email) and password you used to create the Jozu Hub account.
Note: As you are typing the password, it won't show on most terminals, so don't be surprised, just hit enter when you are done.
Importing an LLM from Docker Model Runner to Jozu Hub
Pulling & Extracting the model from Docker
As mentioned earlier, we'll be using the 4-bit quantized version of the SmolLM2 360M parameter LLM, which is what the :latest tag points to. If you run a docker model pull without specifying a tag, Docker will automatically use :latest.
I'll show you how to extract the GGUF model file. Why go through this extra step? It's useful if your company already has a custom model running via Docker Model Runner; you can extract the GGUF file and package it for Jozu Hub. Otherwise, the recommended approach (which I'll show later) is to download the GGUF model directly from Hugging Face.
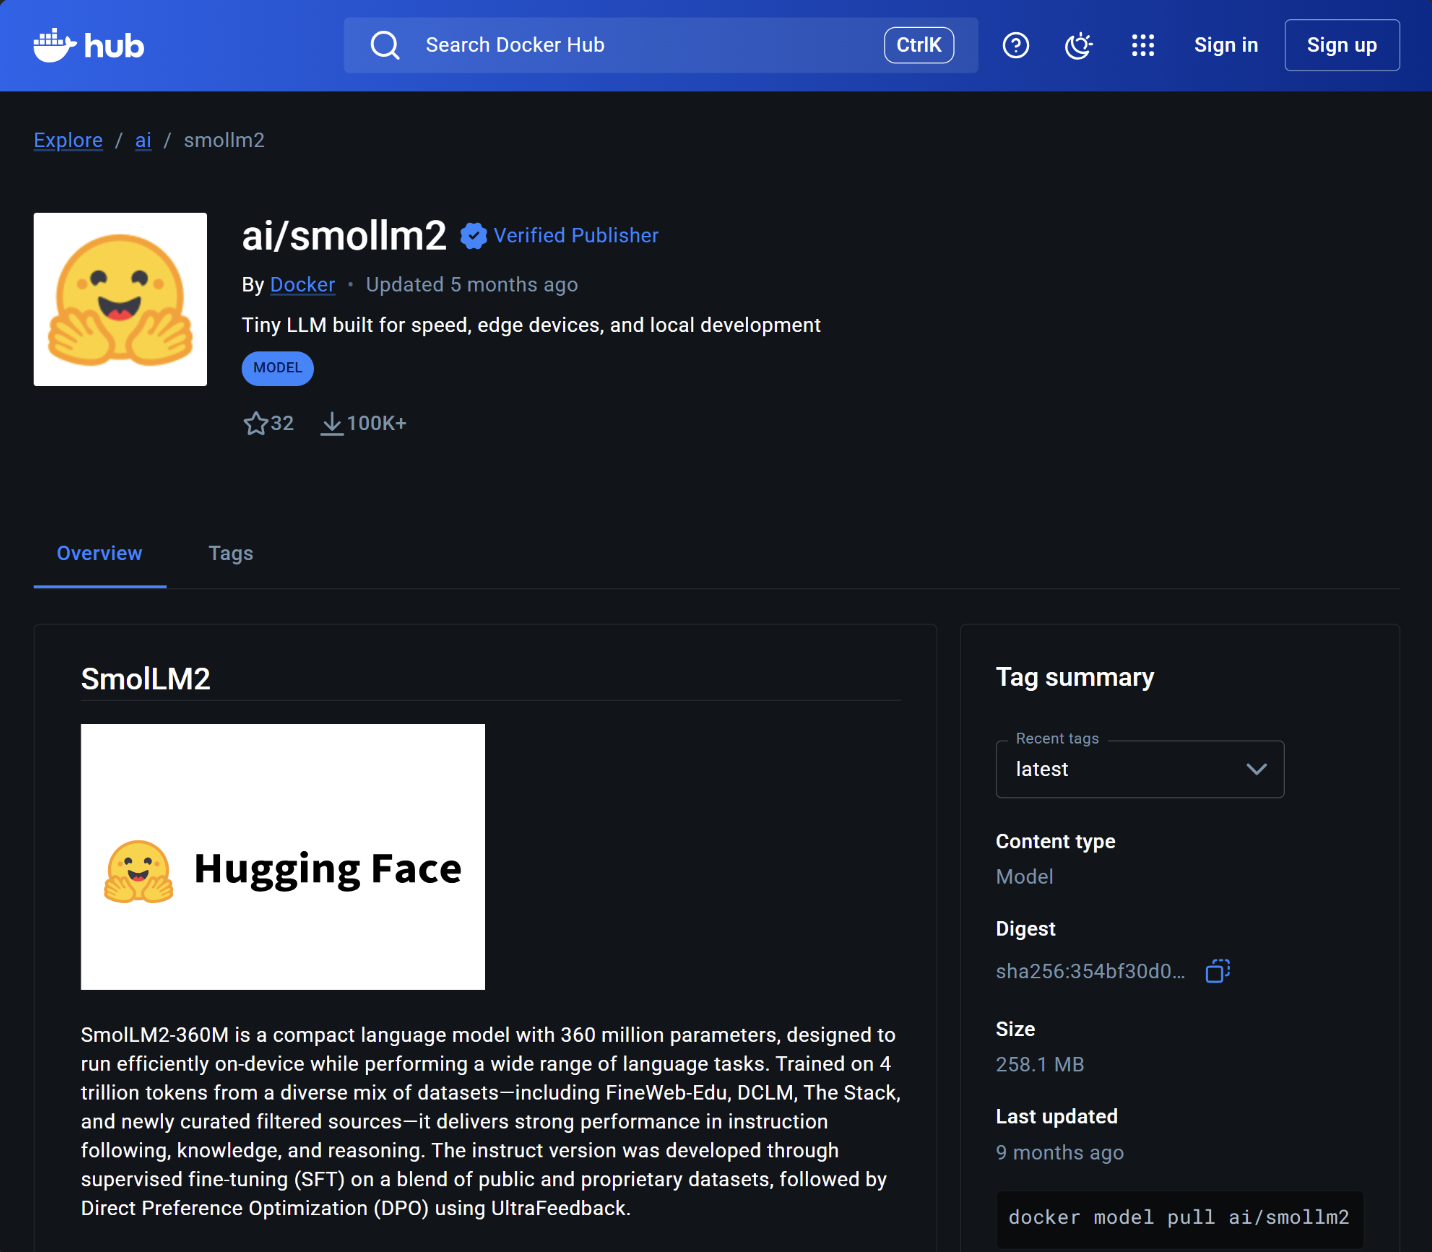
To pull the model, run the following command:
docker model pull ai/smollm2After the model has been pulled, we can run with Docker Model Runner (make sure to do this, so the model is loaded into memory where we can see it to extract):
docker model run ai/smollm2Here is a screenshot of a sample conversation with the model

To extract the model gguf file, let's first obtain the Container ID of the Docker Model Runner:
docker psYou should see something like below, copy the Container ID from the Docker Model Runner row.

Next, we will inspect the smollm2 Docker model to obtain its ID. This is so after extraction, we know what folder (it is named after the ID) has our model's gguf file inside:
docker model inspect ai/smollm2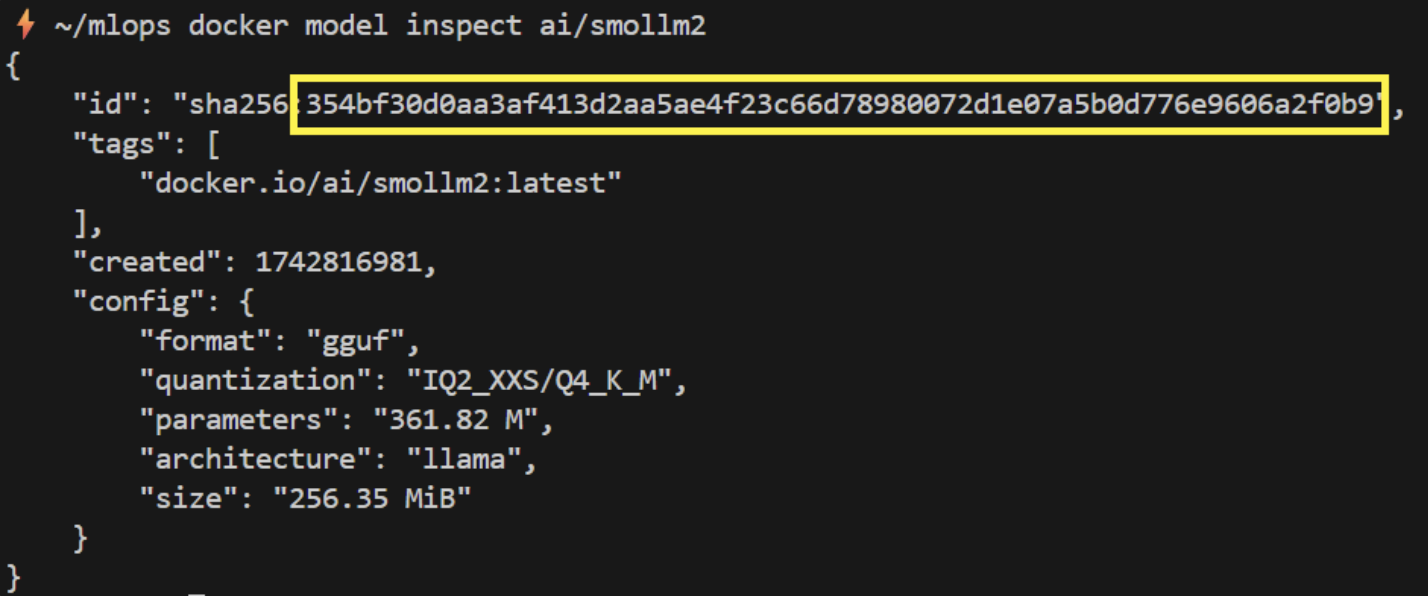
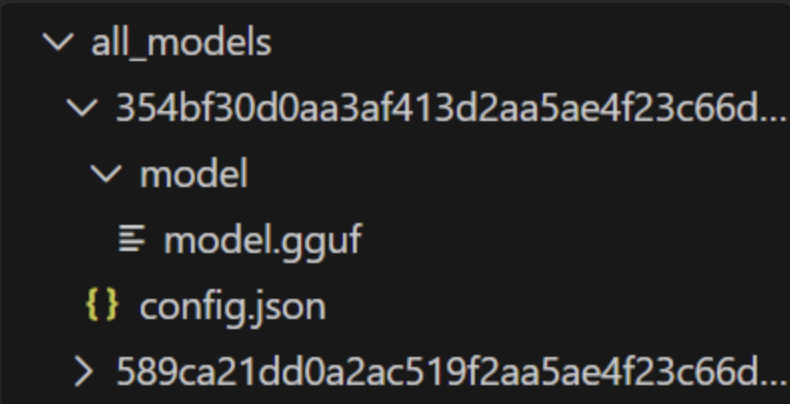
Finally, to extract the folders with the model gguf file to your local machine, run the following command:
Note: This internal container path (/models/bundles/sha256) is implementation-specific. The command below was verified with Docker Engine 27.2.0 and Docker Model Runner v1.0.9. It may change in future releases.
docker cp <put-docker-model-runner-container-id-here>:/models/bundles/sha256 ./all_modelsYour file system should look like below, notice how the model.gguf file is inside a model folder, which itself is inside the folder named after the model's ID:
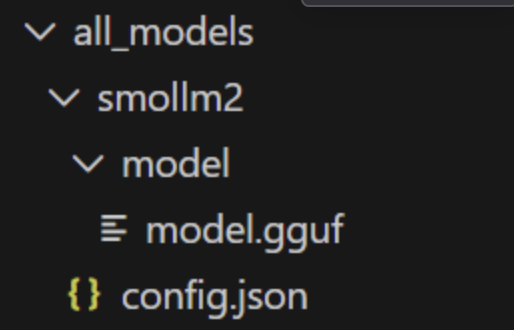
Now simply rename the folder to smollm2 for convenience:
To obtain the gguf file of a model from Hugging Face, go there and search for the model name + "gguf", for example, in our case, the search will be "smollm2 gguf", then sort the results by most downloads and select one from a reputable organization or one with a high number of downloads. In the image, either Unsloth or HuggingFaceTB would be a good choice.

Then, on the model page, go to the file section and simply download the quantized gguf you want. In the image, there is HuggingFaceTB, which provided only the 8-bit quantized gguf. If you don't want that, you can check the others, like unsloth from earlier.

Packaging & versioning the model's gguf file as a ModelKit
The code below creates a Kitfile with the information of the artifacts we need bundled as a ModelKit. For illustrative purposes, I included the config.json, although the gguf file already has some config like chat template, tokenizer, etc., encoded in it.
from kitops.modelkit.kitfile import Kitfile

# Create new Kitfile
kitfile = Kitfile()

# Set basic metadata
kitfile.manifestVersion = "1.0"
kitfile.package = {
    "name": "smollm2",
    "version": "1.0",
    "description": "Sample kitfile for SmolLM2"
}

# Configure model information
kitfile.model = {
    "name": "smollm2",
    "path": "all_models/smollm2/model/model.gguf",
    "version": "1.0",
    "license": "Apache 2.0",
    "description": "GGUF file for smollm2"
}

# Add code files
kitfile.code = [
    {
        "path": "all_models/smollm2/config.json",
        "description": "config json file of smollm2"
    }
]
# You can also add other information like below:

# kitfile.datasets = [
#     {
#         "name": "dataset",
#         "path": "data/sample.csv",
#         "description": "full dataset",
#         "license": "Apache 2.0"
#     }
# ]

# kitfile.docs = [
#     {"path": "docs/README.md"},
#     {"path": "docs/LICENSE"}
# ]

# For more information on what you can add, see https://kitops.org/docs/pykitops/how-to-guides/
# Save the Kitfile locally (Note: It is the Kitfile that specifies how the ModelKit will be bundled)
kitfile.save("./SmolLM2-Kitfile")
Upload the ModelKit to Jozu Hub
Before we can push our ModelKit to Jozu Hub, we first have to create a repo, so head over and create one.


We can now push our ModelKit with the code below:
from kitops.modelkit.manager import ModelKitManager, UserCredentials

# Configure the ModelKit manager
# Note: The email prefix of jack123@gmail.com is just jack123

modelkit_tag = "jozu.ml/email-prefix-here/repo-name-here:latest" # all in lowercase
manager = ModelKitManager(
    working_directory=".",
    modelkit_tag=modelkit_tag,
    user_credentials=UserCredentials('full-email-here', 'password-here', namespace='repo-name-here')
)

# IMPORTANT: In production, never hardcode credentials.
# Use environment variables or a secrets manager instead.

# Assign your Kitfile
manager.kitfile = kitfile

# Pack and push to Jozu Hub
manager.pack_and_push_modelkit(save_kitfile=True)
We then go to Jozu Hub to check that it has been pushed:

Deploying to Kubernetes with Jozu Hub's Rapid Inference Containers (RICs)
Now we've reached the fun part, letting Jozu generate the inference containers for us. Since our goal is to deploy to Kubernetes, we'll grab the Kubernetes deployment YAML directly from Jozu Hub. In the ModelKit repository we created earlier, navigate to the Deploy section, select Kubernetes as the target, and choose the llama.cpp container type, and copy the generated YAML.

Now, create a YAML file named jozu-deploy.yaml and paste the copied contents into it. And then we run the following command to create our pod from the definitions in the file.
kubectl apply -f jozu-deploy.yamlThen check the logs to ensure the pod is running well. The second image is after I scrolled down, so you can see the model is being served on http://0.0.0.0:8000:
kubectl logs smollm2-llama-cpp

What is left now is to forward the 8000 port, so we can communicate with the pod, and to do that, run the following command:
kubectl port-forward pod/smollm2-llama-cpp 8000:8000You should have a response like the one below, which shows that the port 8000 was forwarded to 127.0.0.1:8000 on our machine.

Phew, time to check http://127.0.0.1:8000 on your browser, you will see the generated chat interface.

We can also communicate with it via the OpenAI sdk by just pointing the base_url to http://127.0.0.1:8000:
from openai import OpenAI

client = OpenAI(
    base_url="http://127.0.0.1:8000/",
    api_key="sk-no-key-required"
)

response = client.chat.completions.create(
    model="smollm2",
    messages=[
        {
            "role": "user",
            "content": "write a corporate letter asking for funding for the R&D robotic department.",
        }
    ],
    stream=False,
    temperature=0.8,
    max_tokens=500,
)

print(response.choices[0].message.content)
Conclusion
Recap of what was built
In this tutorial, we walked through a complete workflow for deploying an on-premises LLM managed by Jozu Hub and running it as a Jozu Rapid Inference Container on a local Kubernetes cluster using Minikube.
We started by pulling a quantized open-source model with Docker Model Runner, extracted the underlying GGUF file (and also showed how to obtain the GGUF directly from Hugging Face), then transitioned into a more ML-native workflow by packaging and versioning the model and its supporting assets as a ModelKit.
Production tips
Here are tips to improve the latency and concurrency of the models served locally:
-
Scaling Strategies:
- Horizontal Scaling: Deploy multiple replicas of your RIC pod behind a Kubernetes Service to distribute inference load. This is ideal for managing high volumes of concurrent requests. Use the Horizontal Pod Autoscaler (HPA) to automatically add or remove pods based on CPU or custom metrics.
- Vertical Scaling: Assign more resources (CPU, GPU, memory) to a single RIC pod. This is best for reducing latency on very large models. Use the Vertical Pod Autoscaler (VPA) for automated management.
-
Leveraging GPUs for Performance: If you have access to NVIDIA GPUs that meet your model's requirements (as discussed in the hardware requirements section), use them. Jozu RICs automatically detect and take advantage of available GPUs, resulting in drastically faster inference speed.
-
Managing a Multi-Model Cluster: You'll likely want to serve multiple models in parallel. Multiple different ModelKits can be deployed as separate RIC deployments within the same cluster. You can also use Kubernetes namespaces to isolate environments or teams (for example,
prod-llms,staging,research) and apply resource quotas to ensure fair sharing of CPU, GPU, and memory across workloads. -
Cost Management: Use Kubernetes cluster autoscaling to power down nodes during low-traffic periods.
-
Security: Integrate Jozu Hub's security scanning and cryptographically sign ModelKits with cosign. In Kubernetes, store sensitive configuration in Secrets, apply least-privilege RBAC, and enforce network policies.
Additional resources / What's Next
If you want to go deeper into on-prem LLM deployments, inference engines, and production-grade AI/ML workflows with Jozu Hub, the resources below are a great place to continue:
- Jozu Blog (best practices, architecture deep dives, and production guidance): https://jozu.com/blog
- KitOps Documentation (detailed guides on ModelKits, versioning, and ML artifact management): https://kitops.org/docs
- Jozu Hub Docs (RICs, audits, governance, deployments, etc.): https://jozu.ml/docs
Jozu Hub gives you the governance, versioning, and supply chain security that production AI deployments require, without rearchitecting your existing workflow. It also offers a public model catalog with pre-packaged models you can deploy immediately. Head over to jozu.com to get started.
Note: This blog has an accompanying GitHub repository that contains the commands and examples we showed. Check it out at llm-deployment-jozu-hub.